Editing your videos: a complete guide to the Vocal Video editor
The Vocal Video editor makes it easy to edit, publish, and share video testimonials and audiograms from automatically produced video drafts. Most edits can be done simply by editing text: select words in the transcript and click Cut to remove footage from the video, Mute to silence them, or Edit to fix a transcription.
AI Tools handle the things that usually take real expertise — removing filler words, tightening silences between sentences, blurring or replacing the background, and balancing voices across speakers — with a single click each.
Jump to...
- Transcript-based editing
- Editor overview
- The timeline
- AI Tools
- Design
- Scene Settings
- Publishing your video
- Frequently Asked Questions
Transcript-based editing

For video and audio scenes, the spoken transcript appears next to the scene thumbnail with each word individually selectable.
Selecting words:
- Click to select a single word, and to position the playhead on that word and play from there.
- Double-click to fix the transcription of a single word.
- Click and drag to select multiple words.
When one or more words are selected, an action toolbar appears with these options (and matching shortcuts):
- Edit (Enter) — opens an edit field where you can fix the transcription. If the same phrase appears elsewhere in the video, you’ll get an Update all (N) button to fix it captions and transcript.
- Mute (M) — silences the audio under those words; captions stay visible. Press M again to unmute.
- Cut (Delete / Backspace) — removes the the selected video footage and words from the transcript and captions. By default, cut words collapse into a small dashed divider in the transcript; click the divider to select the cut span and press Restore Cut Footage to bring it back. (To see cut words inline as strikethrough, switch the view dropdown to Transcript + Cut Footage.)
- Restore Cut Footage — appears when your selection includes previously-cut words. The button shows how many seconds will come back.
- Adjust Mute Timing — when your selection sits entirely inside a muted span, this button opens the timeline at maximum zoom with draggable handles on each end of the mute. Drag the handles to fine-tune exactly when the mute starts and ends — useful when a mute is clipping a syllable or letting a stray sound through. The minimum mute length is 0.05 seconds; you can’t drag past adjacent mutes.
You can undo a cut or mute just like any other edit (⌘/Ctrl + Z).
Fix words and punctuation
The Edit popover lets you change spelling, fix proper nouns, or replace a phrase entirely. If you type more words than were originally spoken, the new words inherit the timing of the surrounding selection. Punctuation can be edited too — including by typing a comma or period at the end of a word.
Pro tip: If the same misspelling appears more than once, the Edit popover shows an Update all (N) button. One click fixes every instance — usually the fastest way to clean up a recurring brand name or product term across long interviews.
Editor overview
Open the editor by clicking into any video from your Videos dashboard. New responses to your video collectors show up there automatically.
The editor is split into four working areas:
- Top bar — title, undo/redo, sharing, collaborators, publish.
- Preview (center) — the playable video, where you click to edit text, logos, and the thumbnail directly.
- Left panel — the scene list and transcript.
- Right sidebar — six inspector panels: AI Tools, Design, Captions, People, Comments, Music, plus a context-sensitive Scene panel.
Below the preview you’ll find the playback controls and a collapsible Timeline.
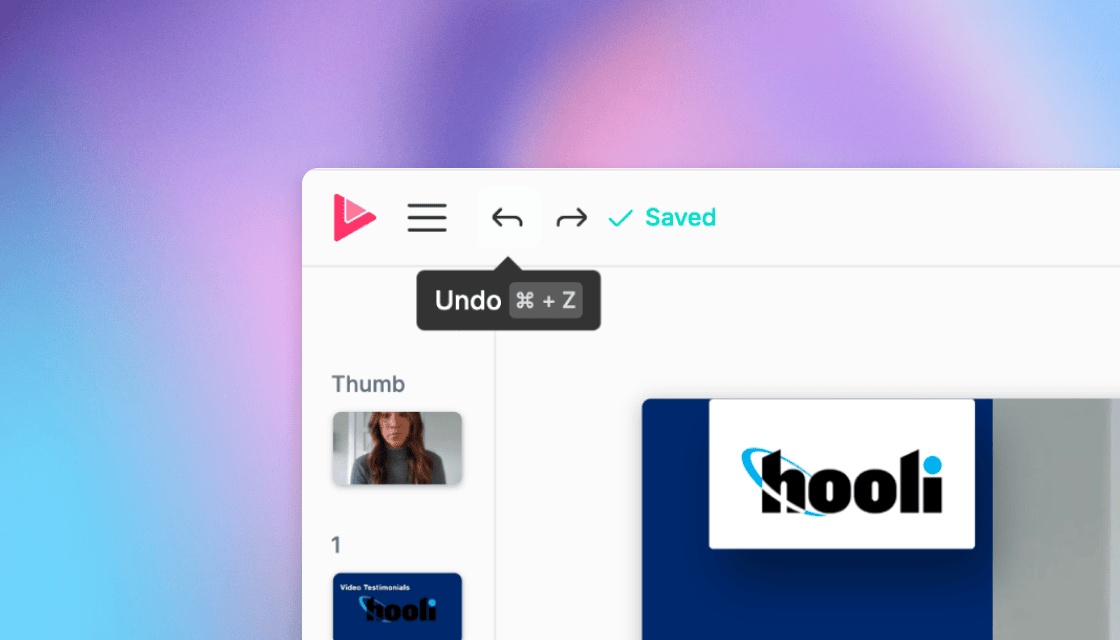
Everything you change saves automatically, and can be undone. A small Saved check appears next to the undo/redo buttons in the top bar each time a change is committed; a spinner appears while a save is in flight.
Top bar
Video title and details popover

Click the video’s title in the center of the top bar to open the video details popover. From here you can edit:
- Video Title — the public, human-friendly name (up to 120 characters).
- Internal title — optional name shown only to your team.
- Description — short summary used for SEO and link previews (up to 200 characters).
- Video URL — the slug at the end of your share link. Changing it will prompt you to confirm, since old links stop working.
- Star — flag the video as a favorite from your dashboard.
- Duplicate — make a copy of the video, including all your edits.
- Delete — move the video to your trash.
A save status indicator (Saving / Saved / Error saving) sits inside the popover so you can confirm a recent change committed.
Undo and redo
The two arrow buttons next to the Vocal logo undo and redo your most recent changes. Most edits — text changes, transcript cuts, mutes, design tweaks, scene reorders, scene deletes, attachment swaps — are undoable.
- Undo: ⌘ + Z (Mac) or Ctrl + Z (Windows/Linux)
- Redo: ⌘ + Y or ⌘ + Shift + Z (Mac); Ctrl + Y or Ctrl + Shift + Z (Windows/Linux)
The editor keeps your last 50 undoable actions per video for up to 4 hours, even if you close and reopen the tab. If a teammate edits the video while you’re away, an undo step that conflicts with their change won’t be applied — you’ll see a “Couldn’t undo — scene was modified”.
Share
The Share button opens a dialog where you can email a viewing or editing link to a teammate or guest, or copy a public link, embed code, or download. The + button in the avatar group opens the same dialog. For a full breakdown of the sharing options, see Sharing and Embedding Videos.
Comments
The speech-bubble button toggles the Comments sidebar panel — same as clicking Comments in the right rail. Comments left on specific moments of the video also appear as small avatars on the playbar; click one to jump to that timestamp.
Presence: who else is here

Avatars to the right of the + show every other Editor or Reviewer with the same video open right now. The list updates in real time as people join or leave. Hover an avatar to see who it is.
When two people edit the same video at once, the editor uses optimistic concurrency:
- Edit advisory — when a teammate saves a change, a dismissible banner appears at the top of the editor letting you know the video has been modified. Reload to see their change.
- Stale-edit block — if you try to save a change after a teammate’s change conflicts with yours, the editor blocks the save with a non-dismissible banner asking you to reload. Your unsaved keystroke or selection is preserved in the UI until you reload.
- URL changed — if the video’s slug is changed elsewhere, you’ll see a banner prompting a reload to the new URL.
Publish / Republish

The green Publish button on the right renders your video in HD and makes it available to share. After the first publish, the same button reads Republish — press it any time you want a new HD render that includes your latest edits. Until you Republish, your changes stay in draft and aren’t reflected on your public page, embeds, or downloads.
The Publish dialog also lets you set a few things that travel with the video:
- Public Title / Internal Title — the names shown externally vs. inside your team.
- Public URL — the slug at the end of your share link.
- Description — short copy used for SEO and link previews.
- Featured Quote — the line pulled out for use in video cards and galleries.
- Visibility — Public & Searchable (indexed by Google), Public (link-only), or Private (download only). See Visibility Settings for the full breakdown.
Your video takes a few minutes to render. You’ll receive an email with the public URL when it’s ready.
If your account is on the free tier and the video has scenes that aren’t allowed (e.g. premium themes), the Publish button will route you to an explanation of what to fix. Free accounts also include a Vocal Video watermark on every published video.
Preview area
The preview in the center of the editor is your live video. Pressing Space plays or pauses it.
Click-to-edit overlays
Most things you see in the preview are editable:
- Text fields — click any teaser, headline, body text, or attribution shown on screen and start typing. Hit Enter to save (or click outside the field).
- Logo and corner logo — click to open the upload modal.
- Thumbnail text — when the playhead is on the thumbnail (the very first card in the scene list), the same click-to-edit applies to the thumbnail headline and subhead.
- Avatars — for audio scenes, click the photo to upload a different image.
A dimmed click target means that element is turned off in the current scene; switch it back on from Scene Settings in the right sidebar.
Format and layout
Above the preview, two dropdowns control how the video is framed:
- Format (16:9 / 1:1 / 9:16) — switches between Horizontal, Square, and Vertical aspect ratios. Use Vertical for Shorts/Reels/TikTok, Square for LinkedIn and Instagram feeds, Horizontal for YouTube and most websites.
- Layout (Fill / Fit) — controls how each video clip is fitted to the frame. Fill crops to fill the entire frame; Fit shrinks the clip to show all of it, leaving colored bars on the sides if needed.
When you choose Fill with a clip whose orientation doesn’t match the frame, an alignment control appears in Scene Settings so you can drag the visible region to the right spot.
Playback controls
Underneath the preview is the playbar plus a row of buttons.
The playbar shows the current position and lets you scrub by clicking or dragging. Comment markers (small avatars) on the playbar indicate where teammates have left frame-specific feedback — click one to jump there and read it. Hover anywhere on the bar to see a timestamp tooltip.
Buttons, left to right:
- Timeline (T) — show or hide the timeline panel below.
- Add Scene — dropdown to insert a new video, audio, image, text, logo, or “logo + text” scene, or to copy scenes from another video.
- Time display — current position / total duration.
- Back 5s / Play / Forward 5s — basic transport. The play button changes to Replay when the video has finished.
- Comment — opens the Comments sidebar (same as the top bar bubble).
- Light/Dark — UI mode toggle — see below
- Keyboard — opens the full keyboard shortcuts reference in a modal.
Playback shortcuts
- Space — Play / Pause (or Replay if finished)
- ← / → — Back / Forward 1 second
- Shift + ← / Shift + → — Back / Forward 5 seconds
- , / . — Back / Forward 1 frame (useful for finding the exact split point)
Light/dark mode
The sun/moon button at the bottom-right of the playback controls toggles the editor’s light/dark theme. This affects only your view; it does not change the published video.
Left panel: the scene list
Every scene in your video — plus a Thumbnail card always pinned to the top — appears here in playback order.
Working with scenes
- Click anywhere on a scene to scrub the playhead to its start.
- Drag the scene thumbnail to reorder it. The video re-renders the new sequence as soon as you drop.
- Hover between two scenes to reveal an + divider — click it to insert a new scene at that exact spot.
- Settings (sliders icon) — opens that scene’s Scene Settings panel in the right sidebar.
- Kebab menu (⋮) — quick actions: Scene Settings, Duplicate Scene, Delete Scene.
- Add Scene at the top of the panel — same as the playback-controls dropdown, but inserts at the end.
Editing speaker attribution
Click a respondent’s name or title at the top of any video/audio scene to edit it inline. Hit Enter to save. Edits propagate everywhere that person appears (scene list, attribution cards in the video, and the People panel).
Transcript view modes
The dropdown in the top-left corner of the scene list switches between three views, depending on how much detail you want next to your scenes:
- Scenes Only — just the thumbnails, useful when you want more space for the preview.
- Scenes + Transcript (default) — scenes paired with a clean transcript. Cuts you’ve made are hidden behind a small dashed divider so the spoken text reads continuously.
- Transcript + Cut Footage — shows everything, including cut words rendered with strikethrough so you can see what was removed and where.
You can switch modes any time without losing your edits — it only affects what you see.
Timeline

Press T or click Timeline in the playback controls to open the timeline panel. It gives you a horizontal view of every scene with frame-accurate filmstrips, audio waveforms, and a draggable playhead.
Trim scenes by dragging
Each video and audio scene shows the full source clip; the trimmed portion is the highlighted region. Drag the handles at the start or end of a clip to trim it. For non-media scenes (text, logo, image), drag the right edge to set the duration (1–30 seconds).
Split a scene at the playhead
Click Split at the top of the timeline (or press S). The current scene is divided in two at the playhead, and the new second half becomes its own scene that you can reorder, retrim, or delete.
Pro tip: Before you split, press , or . to nudge the playhead one frame at a time. It’s the easiest way to land the split exactly between sentences instead of mid-syllable.
Delete a segment or scene
Click a trim handle (selecting that segment) or a whole scene group, then press Delete or Backspace. To bring a deleted scene back, use undo (⌘/Ctrl + Z).
Zoom
Use −, +, and Fit at the top right of the timeline to control horizontal zoom. The percentage between them is the current zoom level.
- ⌘ + + / ⌘ + − (Mac) or Ctrl + + / Ctrl + − — zoom in / out
- Fit — zooms out so the entire video fits in the visible timeline width
Drag the playhead
Grab the orange playhead handle at the top of the timeline and drag to scrub. The playbar above moves with it.
Zoom Effects
To add effects often seen in talking head videos, hover over a scene in the timeline, and choose the icon that appears in the top right corner. Once you apply the zoom effect, you can choose how dramatic or subtle you'd like to make it with strength and focal point settings
Punch In: Immediate zoom in, often used in talking head videos on Youtube and social.
Quick Zoom In: Nice way to smooth out video trims.
Zoom In: Can provide emphasis and visual interest.
Slow Zoom In: Good for hooks
Slow Zoom Out: Often used for video hooks.

Right sidebar
The right sidebar holds the six panels that drive most of the design and AI features. Click an icon on the rightmost rail to open a panel; click again or hit Esc to close.
AI Tools

- Background Effects — choose None, Blur, Remove, or Replace for the background of every video clip with a person in it. Blur has a slider for blur strength; Replace uploads or selects a still image. Background effects render at full quality at publish time, even if your browser previews them at lower fidelity. See Background Blur and Removal for the full breakdown. (Pro feature.)
- Studio Sound — AI audio cleanup that removes room noise and echo, evens volume between speakers, and enhances voice clarity. On by default for new videos (configurable in your Video Settings). Previewing uses a fast model; the published render uses the highest-quality version.
- Remove Filler Words — toggle on to automatically mute “um,” “uh,” “hmm,” and similar sounds across every scene. You can still unmute individual words via the transcript toolbar.
- Shorten Word Gaps — toggle on to tighten silences between words. The Gap threshold slider (0.2s–2.0s) sets the minimum gap that triggers a tightening. Gap-shortening runs after filler-word removal, so muted words can also be removed when this is on.
- Find & Replace — type a word or phrase in Find, the replacement in Replace with, and click Replace All to update every occurrence across all scenes’ transcripts and captions. Tick Preserve original capitalization to match capitalization at each occurrence.
Pro tip: Background effects and Studio Sound preview at lower fidelity so the editor stays smooth while you scrub. Don’t worry if a blurred background looks blocky or a Studio-Sound-cleaned voice sounds slightly odd in the preview — the published render uses the highest-quality version.
Design

The Design panel has four tabs:
- Theme — pick a visual style for your video (animations, layout, typography defaults). Premium themes are free to preview but require a Pro plan to publish.
- Colors — set up to four palette colors (A/B/C/D). Below the palette, expand each scene type (Video, Audio, Text, Logo, Thumbnail) to assign which palette color is used for backgrounds, headlines, kickers, accents, etc. Defaults come from your workspace Brand Kit.
- Fonts — pick fonts for Teasers, Headlines, Body Text, Attribution Names, Attribution Titles, and Captions. Each can be left at the theme’s default or overridden. Pro fonts are free to preview but require an upgrade to publish. Enterprise customers can upload custom fonts.
- Logos — upload a Main Logo (used in Logo Scenes and most attributions) and an optional Corner Logo (a watermark in one corner of every scene). For each, you can choose a transparent / white / dark backing card. The corner logo can be positioned Top Left or Top Right, and you can choose whether it appears in the thumbnail.
Captions

- Show captions — turn visible captions on or off across the video. Even when display is off, you can still download captions and the transcript once the video is published.
- Highlight current word — toggle the moving highlight that follows along with the spoken word.
- Caption Position — drag the caption frame inside a small preview to set vertical position. Attribution cards automatically reposition so they don’t overlap with captions.
To change the caption font, click Design → Fonts → Captions — there’s a shortcut link at the bottom of the panel.
People
A directory of every speaker in the video, one card per respondent. For each person you can:
- Edit their displayed name and title/description inline. Edits flow through to attribution cards and the scene list.
- See whether they agreed to your video release (green badge = agreed; red badge = not agreed). Click a badge to view release details.
- Click into a person’s card to jump straight to their first scene.
Use the People panel when you want to fix several speakers’ names at once without scrubbing through the video.
Comments
A reverse-chronological feed of all comments, replies, and feedback on this video. Comments left on specific moments are timestamped and clickable — click a comment to jump the playhead to that frame.
The Follow toggle at the top of the panel subscribes you to email notifications for new comments and replies. Comments left elsewhere (e.g. by reviewers on the public review page) appear here too.
Music
Two tabs:
- Settings — shows the currently selected soundtrack (or “None”), with a Play/Pause preview and a Music Volume slider. The slider sets how loud the music is mixed against speech (defaults to a low level so voices stay forward). To remove the soundtrack entirely, click Remove.
- Library — Vocal’s stock-music collection. Each track has its own play/pause preview; click Select to attach it to your video. Music loops automatically if your video is longer than the track.
You can also Upload Custom Music (any MP3) from the Settings tab. Custom uploads override library tracks; remove the upload to switch back to a library selection.
Per-scene voice volume is not in the Music panel — open Scene Settings → Volume for the scene you want to change.
Scene Settings (context-sensitive)
The Scene icon in the right rail opens settings for whichever scene the playhead is on right now. The contents change based on the scene type:
Video and audio scenes
- Attribution — toggle the attribution card on/off; click the name to jump straight to the People panel for that speaker.
- Photo (audio only) — upload a still to display while the audio plays.
- Alignment — when Layout: Fill crops part of a portrait or landscape clip, drag the highlighted frame to choose what stays visible.
- Filter — apply a color/grade filter to the scene’s video.
- Colors and Fonts shortcuts — jump directly into the relevant Design tab, scoped to this scene type.
- Background — set the color, gradient, motion, or image that shows behind the speaker. Visible whenever the video doesn’t fully cover the frame (a portrait clip letterboxed in a 16:9 video, Layout: Fit, or Background → Remove in AI Tools), and on every non-video scene type.
- Timing — Pause At Start and Pause At End sliders (0–3 seconds each) hold the scene before audio plays in or out, useful for breathing room around scene transitions.
- Volume — per-scene voice volume slider.
- Convert to audio / video — switch between showing the speaker’s video and showing their photo + waveform only.
- Duplicate Scene / Delete Scene — same actions as the kebab menu in the scene list.
Text and logo scenes
- Text Fields — show/hide the Teaser, Headline, and Body text fields. Click any of them in the preview to edit the text directly.
- Logo (logo scenes only) — shortcut to the Design → Logos tab.
- Colors / Fonts / Background — same shortcuts as for video scenes.
- Duration — slider from 1 to 30 seconds.
Thumbnail (always at the top of the scene list)
- Image — pick a frame from any video scene with Select Frame, or Upload a custom image. If the image’s aspect doesn’t match the video, drag to align.
- Text Fields — choose a style (Headline, Card, or None) and toggle individual fields visible/hidden.
- Filter — apply a color filter to the thumbnail image.
- Background — visible when Background → Remove is enabled in AI Tools.
- Colors / Fonts / Corner Logo — Design-tab shortcuts scoped to the thumbnail.
Adding new scenes
The Add Scene dropdown (top of the scene list, next to the Timeline button below the preview, or on a hover divider between any two scenes) lets you insert:
- Video — choose a scene from a video response or uploaded clip
- Audio — record an audio-only response.
- Upload — upload an existing video or audio file from your computer.
- Text — a full-frame text scene (teaser / headline / body).
- Image — a full-frame image scene with optional text.
- Logo — a full-frame logo scene.
- Logo + Text — combined.
- Copy From Another Video — borrow scenes from a different video in your library.
The choice of where new scenes land depends on where you opened the dropdown: a + divider inserts at that exact spot, while the top-bar dropdown appends to the end.
Reviewer mode

If you have Reviewer (read-and-comment) access instead of full Editor access, the editor opens in a slimmed-down mode:
- The left sidebar shows only Comments.
- The undo/redo, AI Tools, Design, Captions, People, Music, and Scene panels are hidden.
- Click any word in the transcript to jump the playhead to that moment.
- Use the playbar comment indicators or the Comments panel to leave timestamped feedback.
- A Request Edit Access button is available in the top bar if you need full editing.
Migration: opening older videos
If you open a video created before the current editor existed, you’ll see a brief “Migrating…” screen while we convert it to the new format. This usually takes a few seconds. The page redirects automatically when it’s done. No action is required, and your original content is preserved.
Sharing your published video
Once you’ve clicked Publish (or Republish), there are several ways to get your video in front of an audience. Most are reachable from the same Share dialog in the editor’s top bar, or from your video’s public page after it renders. For inspiration, browse the Vocal Video customer examples.
- Embed — copy an embed code for your blog or website. Choose Embed Video Card to include the featured quote.
- Public link — copy the link to your video’s landing page.
- Social media — share directly to Twitter, Facebook, or LinkedIn.
- Download & upload — on a paid plan, download the HD render and thumbnail to upload to YouTube, Instagram, Facebook, TikTok, or Wistia.
- Video galleries — group multiple videos into a carousel, wall of love, list, or grid that you can embed as a single unit.
Quick reference: keyboard shortcuts
Playback
| Action | Shortcut |
|---|---|
| Play / Pause | Space |
| Back / Forward 1 second | ← / → |
| Back / Forward 5 seconds | Shift + ← / Shift + → |
| Back / Forward 1 frame | , / . |
Transcript
| Action | Shortcut |
|---|---|
| Edit selected words | Enter |
| Mute / Unmute selected words | M |
| Cut selected words | Delete / Backspace |
Timeline
| Action | Shortcut |
|---|---|
| Show / Hide timeline | T |
| Split scene at playhead | S |
| Zoom timeline in / out | ⌘ + = / ⌘ + − (Mac), Ctrl + = / Ctrl + − (Win/Linux) |
| Delete selected segment or scene | Delete / Backspace |
Undo / redo
| Action | Shortcut |
|---|---|
| Undo | ⌘ + Z / Ctrl + Z |
| Redo | ⌘ + Y or ⌘ + Shift + Z / Ctrl + Y or Ctrl + Shift + Z |
You can always pull this list up inside the editor by clicking the keyboard icon in the bottom-right of the playback controls.
Frequently asked questions
How do I fix a misspelled word in the transcript?
Find the word in the transcript on the left side of the editor and double-click it to select it (or click and drag across multiple words). Press Enter (or click Edit in the toolbar that appears) to open the editor, type the correction, and click Save. Captions update automatically. If the same misspelling appears elsewhere in the video, an Update all (N) button appears so you can fix every instance at once.
How do I remove “ums,” “ahs,” and other filler words?
Open the AI Tools panel in the right sidebar and toggle Remove Filler Words on. Vocal Video automatically mutes “um,” “uh,” “hmm,” “er,” and similar sounds across every scene. To unmute one specific word, select it in the transcript and press M (or click Unmute in the toolbar).
How do I insert my company’s logo animation at the beginning or end of my videos?
First, upload your logo: open Design → Logos and click the Main Logo card to upload a PNG or SVG. Then add a logo scene to the video:
- Click Add Scene at the top of the scene list (or hover between two scenes for a + divider).
- Choose Logo for a logo-only animation, or Logo + Text to pair it with a teaser/headline.
- Drag the new scene to the very beginning or end of the scene list.
The animation comes from the video’s theme — pick a theme in Design → Theme to change how the logo enters and exits. To set a default logo for every new video, upload one to your workspace’s Brand Kit (linked from the Logos tab).
How do I export my video in a different aspect ratio for social media?
Above the preview, use the Format dropdown to switch between 16:9 (Horizontal), 1:1 (Square), and 9:16 (Vertical). The editor reflows attribution cards, captions, and text fields for the new shape. Click Republish in the top bar to produce a new HD render in that aspect ratio.
If you want versions in multiple aspect ratios at once, Duplicate the video from the title popover (or the dashboard), open each copy, switch its format, and publish.
How do I delete a scene?
Three ways:
- Scene list: click the ⋮ (kebab) button on the scene and choose Delete Scene.
- Scene Settings panel: click Delete at the bottom of the panel.
- Timeline: click the scene to select it and press Delete or Backspace.
If you delete the wrong one, press ⌘ + Z (Mac) or Ctrl + Z (Windows/Linux) to bring it back.
How do I trim the start or end of a video clip?
Two ways, depending on what’s faster for you:
- Transcript: find the words you want to cut from the start or end of the scene, drag-select them, and click Cut in the toolbar (or press Delete). The audio and captions are removed and the timeline tightens.
- Timeline: press T to open the timeline, then drag the handles at the start or end of the clip inward to trim.
How do I split a long scene into two?
Position the playhead at the moment you want to split (use , and . to nudge frame by frame for precision), then press S or click Split at the top of the timeline. The scene becomes two independent scenes you can reorder, retrim, or delete.
How do I add background music?
Open the Music panel in the right sidebar.
- To use stock music: switch to the Library tab, preview tracks with Play, and click Select on the one you want.
- To use your own track: in the Settings tab, click Upload Custom Music and pick an MP3.
Adjust the Music Volume slider to balance music against speech. Music loops automatically if your video is longer than the track.
How do I change the order of scenes?
In the scene list on the left, drag the scene by its handle to a new position. The video re-renders the new sequence as soon as you drop. The Thumbnail card always stays at the top.
How do I blur or remove the background behind a speaker?
Open AI Tools in the right sidebar and choose Blur, Remove, or Replace under Background Effects. Blur has a strength slider; Replace lets you upload or pick a still image to use as the new background. Background effects apply to every video clip with a person in it. (Pro feature.)
How do I turn captions on or off?
Open the Captions panel and toggle Show captions. Even when display is off, captions and the transcript remain downloadable from your published video. To change caption font, use the link at the bottom of the Captions panel to jump to Design → Fonts → Captions.
How do I change the colors used in my video?
Open Design → Colors. The four big swatches at the top (A/B/C/D) are your palette. Below them, expand any scene type (Video, Audio, Text, Logo, Thumbnail) to control which palette color is used for that section’s background, headline, kicker, and accents. To set defaults for every new video, edit your workspace Brand Kit (linked at the bottom of the panel).
How do I share a draft video with a teammate before publishing?
Click the Share button in the top bar (or the + in the avatar group) to open the share dialog. From there you can email a link directly, copy a link to send yourself, or invite a teammate to your workspace as an Editor or Reviewer. Reviewers can leave timestamped comments without changing the video.
How do I update a video that’s already published?
Make your changes in the editor as normal, then click Republish in the top bar. The button reads “Republish” instead of “Publish” once a video has been rendered at least once. Until you Republish, your edits stay in draft and aren’t reflected on the public page, embeds, or downloads.
How do I change a speaker’s name or job title?
Two places work:
- In the scene: click the speaker’s name or title at the top of any of their scenes in the scene list and edit inline. Press Enter to save.
- People panel: open People in the right sidebar to see every speaker in one list and edit them all at once. Changes propagate to every scene where that person appears.
How do I change the video thumbnail?
Click the Thumbnail card at the top of the scene list. In Scene Settings on the right, use Image → Select Frame to grab a still from any video scene, or Upload a custom image. From the same panel you can change the thumbnail’s text style (Headline, Card, or None), toggle the teaser/headline/body fields, apply a filter, and adjust colors and fonts.
How do I mute a word without removing it?
Select the word (or words) in the transcript and press M (or click Mute in the toolbar). Muted words stay visible in the captions and the timeline isn’t tightened — only the audio is silenced. Press M again on the same selection to unmute.
How do I fine-tune when a mute starts or ends?
If a mute is clipping a syllable or letting a stray sound through, you can drag its boundaries to the exact frame:
- In the transcript, click anywhere inside the muted span to select a word that’s entirely inside the mute. The toolbar will show an Adjust Mute Timing button.
- Or, in the timeline, click the translucent rectangle over a muted segment to reveal the same button.
Either path opens the timeline at 400% zoom with draggable handles on the start and end of the mute. Drag a handle to retime that edge of the mute, then release. The minimum mute length is 0.05 seconds; you can’t drag past adjacent mutes.
How do I restore content I cut by accident?
Three options:
- Press ⌘ + Z (Mac) or Ctrl + Z (Windows/Linux) right after the cut to undo it.
- In the default Scenes + Transcript view, click the small dashed divider where the cut lives to select that span — then press Restore Cut Footage in the toolbar.
- For a more precise selection, switch the transcript view dropdown (top-left of the scene list) to Transcript + Cut Footage. The cut words become visible with a strikethrough; select just the words you want back and press Restore Cut Footage.
How do I see who else is editing this video?
Avatars to the right of the + in the top bar show every other Editor or Reviewer with the video open right now. When a teammate saves a change, you’ll see a banner letting you know the video has been modified — reload to pick up their changes. If your save conflicts with theirs, the editor blocks it and asks you to reload before re-applying your edit.
How do I leave a comment on a specific moment?
Pause at the moment you want to comment on, then click Comment in the playback controls (or open the Comments panel and use the input there). Your comment is timestamped to the current playhead position and appears as an avatar marker on the playbar so anyone watching can jump straight to it.
How do I download a transcript or captions file?
Transcripts and caption files are available on the published video’s page, not from inside the editor. Click the X in the top right to return to the public page, then look for the download options there. Captions remain downloadable even if you’ve turned Show captions off.
Troubleshooting tips
- A change didn’t seem to save. Look at the Saved indicator next to the undo/redo buttons. If you see an “Edit conflict — please reload” banner, a teammate changed the same video; reload to pick up their changes, then re-apply yours.
- The undo button is grey. You’re at the top of the undo stack — there’s nothing to undo. The stack also resets after roughly 4 hours or if you clear your browser’s local storage.
- Background effects look low-fidelity in preview. Previews use a fast model so playback stays smooth. The published render uses the highest-quality version regardless of how it looks while editing. Background effects also currently preview only in Chrome and Edge; Safari and Firefox will show the original background until publish.
- Music is too loud / too quiet. Music Volume in the Music panel sets soundtrack level; Volume in Scene Settings sets per-scene speaker volume. With Studio Sound on, leave per-scene volume at 100% and let the AI balance.
- My change shows up for me but not on the public page. Edits stay in draft until you click Republish in the top bar. Republishing produces a new HD render with all your edits.
- A response is sideways or upside-down. Go to Responses, click into the response, and pick Rotate from the ⋮ menu in the top right. The draft video corrects automatically.
- Keep your hands on the keyboard. Click the keyboard icon at the bottom-right of the playback controls (or see the quick reference below) for the full shortcut list. The most useful: Space to play/pause, , and . to nudge frame-by-frame, S to split a scene at the playhead, M to mute, Delete to cut.
- Set defaults once, reuse forever. Open your Brand Kit to set the logos, colors, and fonts every new video should start from. From the editor, you can also save the current video’s look as your video defaults.
- Test in low fidelity, render in high. AI features (background effects, Studio Sound) preview at lower fidelity for editor smoothness. The published render always uses the highest-quality version, so don’t worry if previews look or sound rougher than the final.