
Posting Video Testimonials to LinkedIn
LinkedIn is where your buyers already are, which makes it a natural home for customer testimonials. Videos there play silently as people scroll, so the best ones are short, captioned, and sized to fill the feed. This guide covers how to make them in Vocal Video and how to get them seen.
In this article:
- Upload the video, or share a link?
- Choose a format
- Keep captions on
- Turn one response into a series
- Download and post
- Get your video seen
- Post every new video automatically
Upload the video, or share a link?
- Upload the video file for the most attention. It plays right in the feed as people scroll. This is the best choice for most testimonials.
- Share a link when you want people to land on your video's branded page. Open the published video, click Share, open the Social tab and click LinkedIn. Your post shows the video's thumbnail and links to its public page.
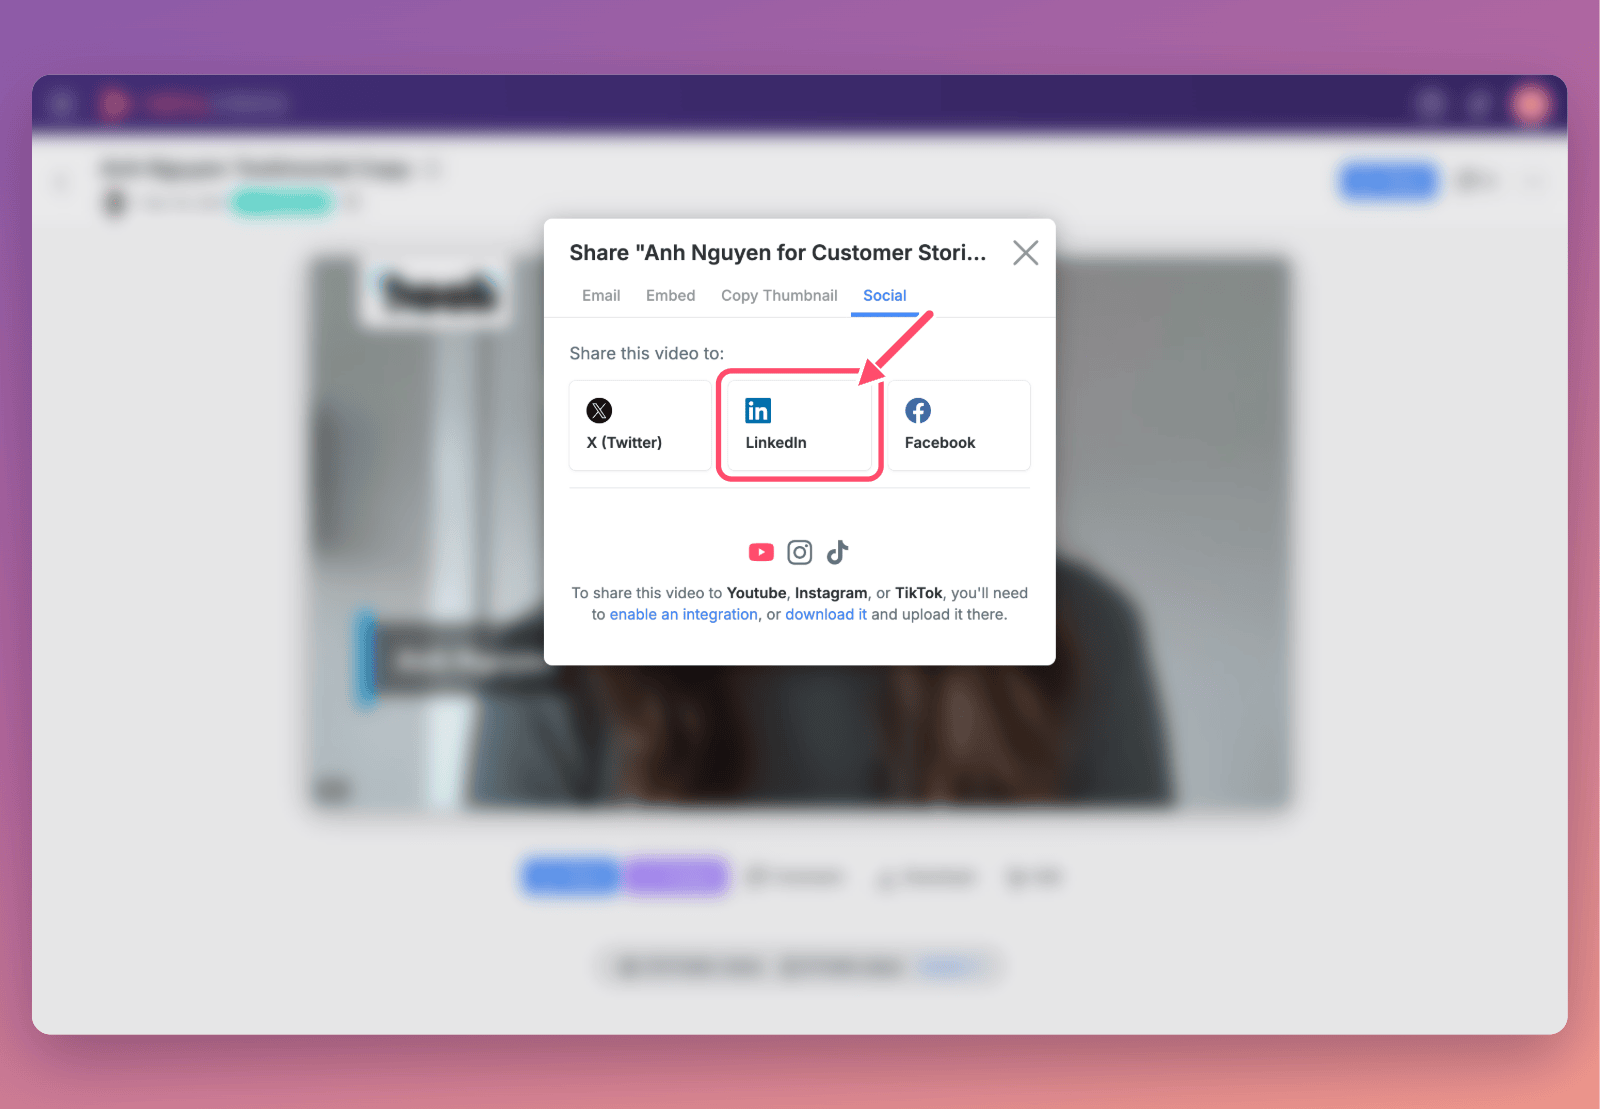
Sharing a link works on every plan, for any video with a public page. Uploading means downloading your video, which is included on Essential, Pro, Scale and Enterprise plans.
Choose a format
LinkedIn shows videos in all three shapes, but they take up very different amounts of the screen on a phone:
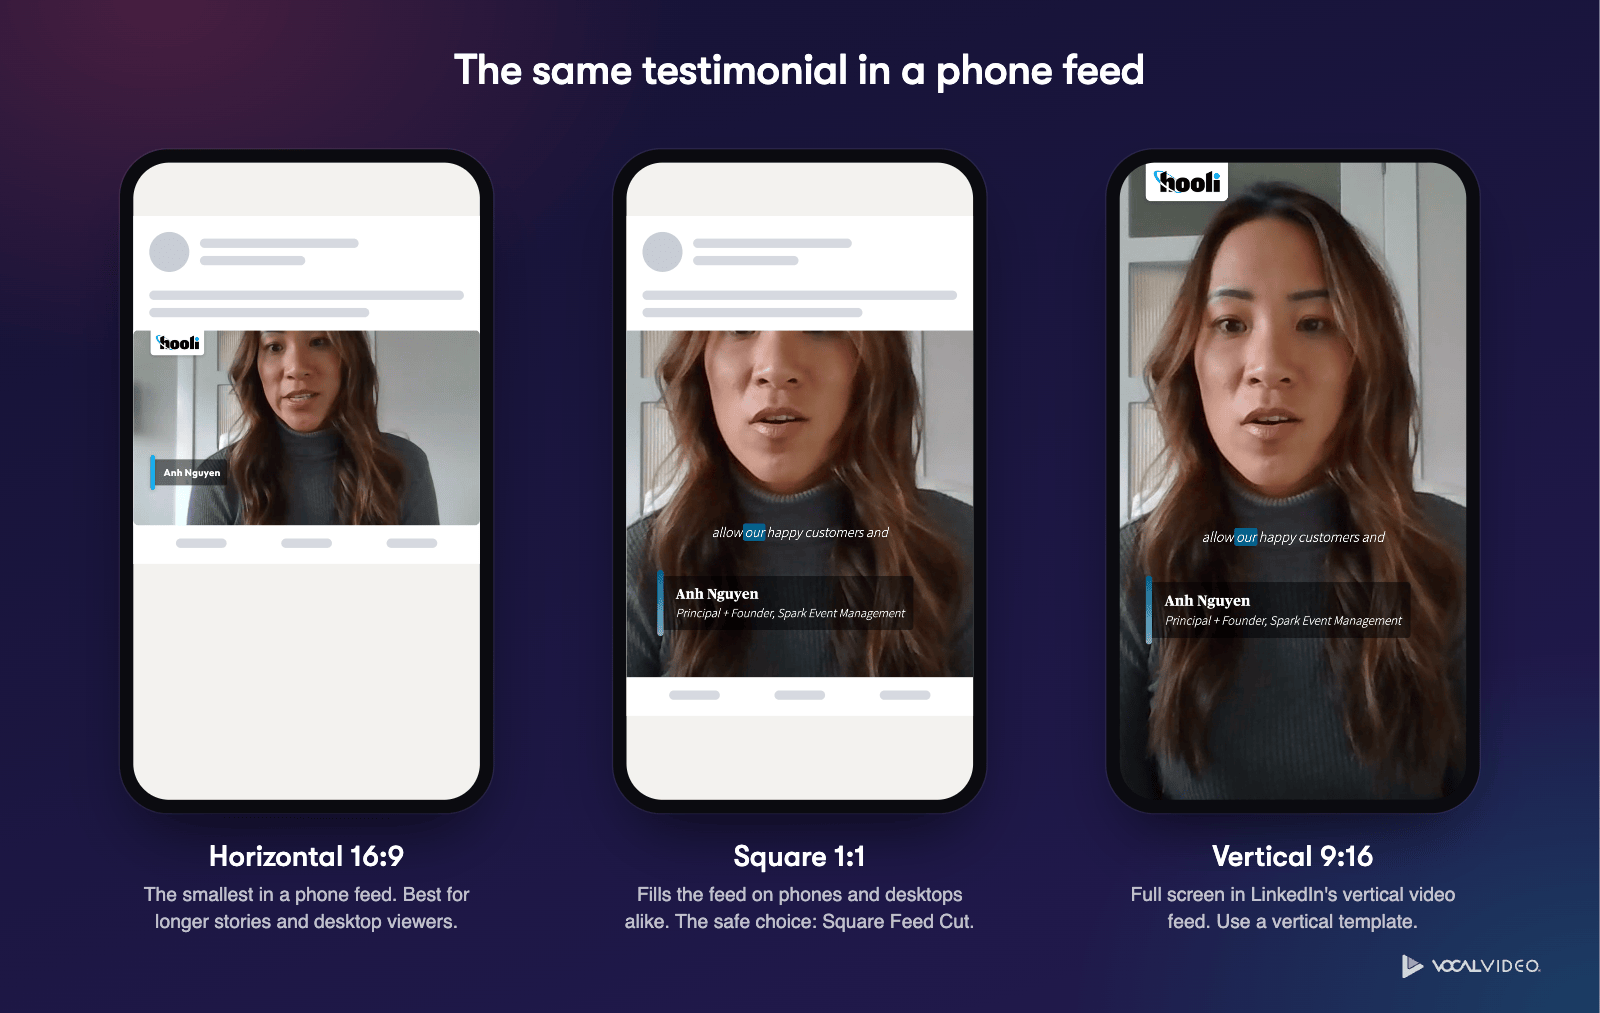
- Square is the safe choice. It fills the feed on phones and desktops alike.
- Vertical fills the whole screen in LinkedIn's vertical video feed.
- Horizontal suits longer stories and people watching on a computer, but it's the smallest in a phone feed.
Start from a template
The Template Library has ready-made templates for LinkedIn. Click Video Templates in the left menu and click the LinkedIn filter:
- Square Feed Cut is made for the LinkedIn feed: one customer, one point per scene, about 45 seconds, with sober styling and captions that carry the message for viewers with the sound off.
- Rapid Fire, Marquee, Newswire and Tilt are short, energetic vertical cuts for LinkedIn's vertical video feed.

Make it yours. The ready-made templates are a starting point, and they're easy to customize. Click a template, then Customize to change its design (colors, fonts, caption style, music and logo), its length, and its editing style, which you describe in plain words in its Instructions. Turn on Use my colors to start from your brand colors. See Video Templates: the Complete Guide.
Change an existing video's format
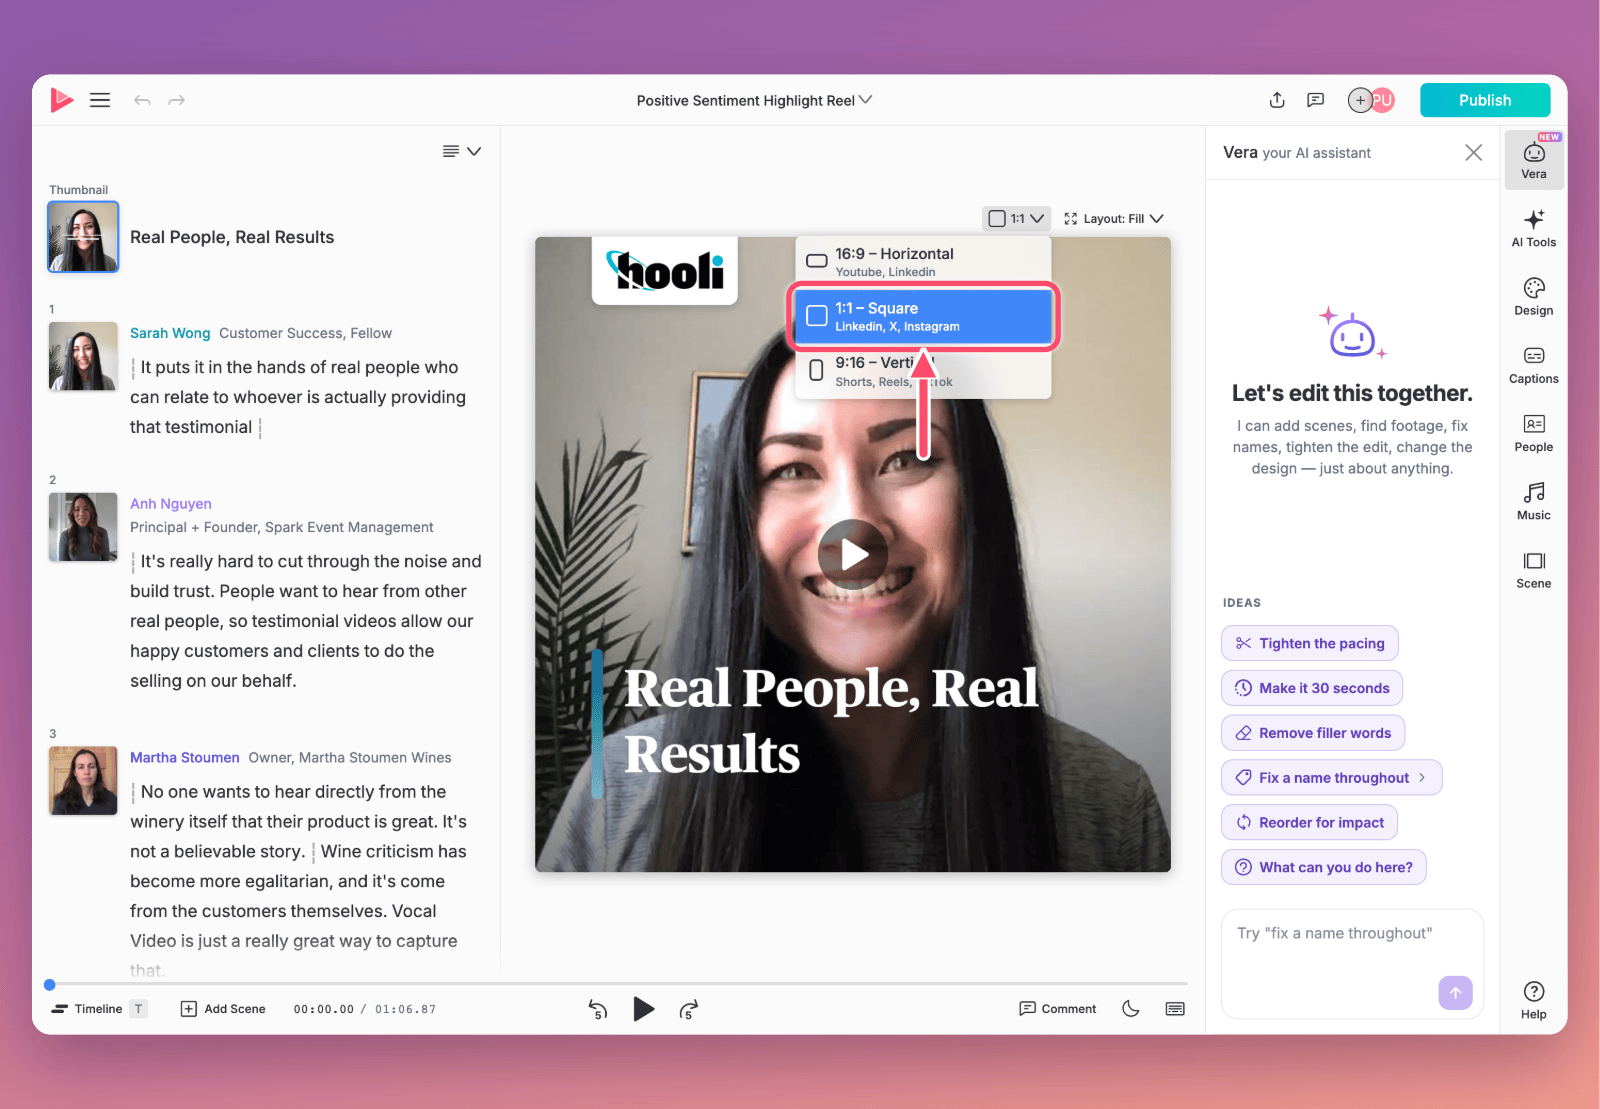
To make a square or vertical version of a video you've already made, open it in the editor, click the format menu above the video, and choose 1:1 – Square or 9:16 – Vertical. Duplicate the video first if you want to keep the original as it is. See How to Change Video Format.
Keep captions on
Most people scroll LinkedIn with the sound off, so a testimonial without captions is a silent face. Keep Vocal Video's captions on: they're styled to match your brand, they show for every viewer, and they stay with the video when someone reshares it.
Prefer LinkedIn's own captions? When you post from a computer, LinkedIn lets you attach a caption file, which viewers can turn on and off. To use one instead of on-screen captions:
- Duplicate the video, so you keep a captioned version for everywhere else.
- In the copy, open Captions and switch captions off with the toggle at the top of the panel, then publish.
- Click Download, then Download Video File and Captions (SRT).
- Attach the caption file in LinkedIn's video settings as you post.

Keep in mind that many viewers never turn on LinkedIn's captions, which is why on-screen captions are the better default.
Turn one response into a series
One customer's answers can fill several weeks of posts. Make a short, square video for each question they answered, then post one a week. Vera can build them all at once. Add Square Feed Cut to your templates (open it in the Template Library and click Customize), then open the response and ask Vera to "make a separate video for each question with the Square Feed Cut template." See How to Split a Response into One Video per Question.

Download and post
- Publish your video, then click Download.
- Click Download Video File. If you'd like to choose your own cover image, click Thumbnail too.
- Start a post on LinkedIn, add the video, and write a few lines about why this customer's story matters.
For more on downloading, see How to Download Your Videos and Raw Responses from Vocal Video.
Get your video seen
- Tag your customer and their company. Mention them in your post. They'll be notified, and they're often happy to reshare a video that features them.
- Share from people, not just your company page. Ask teammates, especially the customer's account manager, to share the video from their own profiles with a line of their own.
- Lead with the best line. Open your post with the strongest thing your customer said, so people stop scrolling.
- Keep it short. Templates for LinkedIn aim for 30 to 45 seconds. Save the full story for your website.
Post every new video automatically
To share each newly published video to LinkedIn without lifting a finger, set up a Zapier integration from Integrations in the left menu. See Automating Vocal Video with Zapier.
When you post a Vocal Video testimonial on LinkedIn, tag Vocal Video so we can see it and cheer you on!
For more information see:
- Video Templates: the Complete Guide
- How to Split a Response into One Video per Question
- Posting Video Testimonials to TikTok
- Posting Video Testimonials to Instagram Reels and Stories
- Posting Video Testimonials to YouTube
- Posting Video Testimonials to Facebook
Still need help? Contact Support at support@vocalvideo.com