
Using Kiosk Mode to Collect Videos at Live Events
Kiosk Mode turns one device into a video booth for a live event: each person records, taps Done, and the collector starts over for the next person.
In this article:
- What Kiosk Mode is and when to use it
- Turning on Kiosk Mode
- Using Kiosk Mode on Macs & PCs
- Using Kiosk Mode on iPads, iPhones & Android devices

What Kiosk Mode is and when to use it
💡 Note: Kiosk Mode is available on Pro plans and above (Pro, Scale, and Enterprise), and during your free trial.
Live events are a great opportunity to collect video testimonials, customer stories, and industry-expert videos. You can distribute a video collector link at your event for attendees to record on their own devices, but what if you want to provide your own recording setup, and you want it to be optimized for multiple people recording on the same device, one after another? That's where Kiosk Mode comes in.
How it works
When you enable Kiosk Mode on a video collector, the respondent interface runs in a loop: when one respondent is finished, the experience seamlessly starts over, ready for the next respondent to begin. All responses from different people are automatically kept separate, even though they are submitted on the same device.
Changes to the final page of video collectors
On the final page of your video collector (the Thank-you page), rather than seeing a Vocal Video promo, or a call-to-action to visit your website, the user will be prompted to tap Done, which will reset the experience for the next respondent. If they leave this page open, the video collector will also automatically reset for the next respondent after 30 seconds of inactivity.
Turning on Kiosk Mode
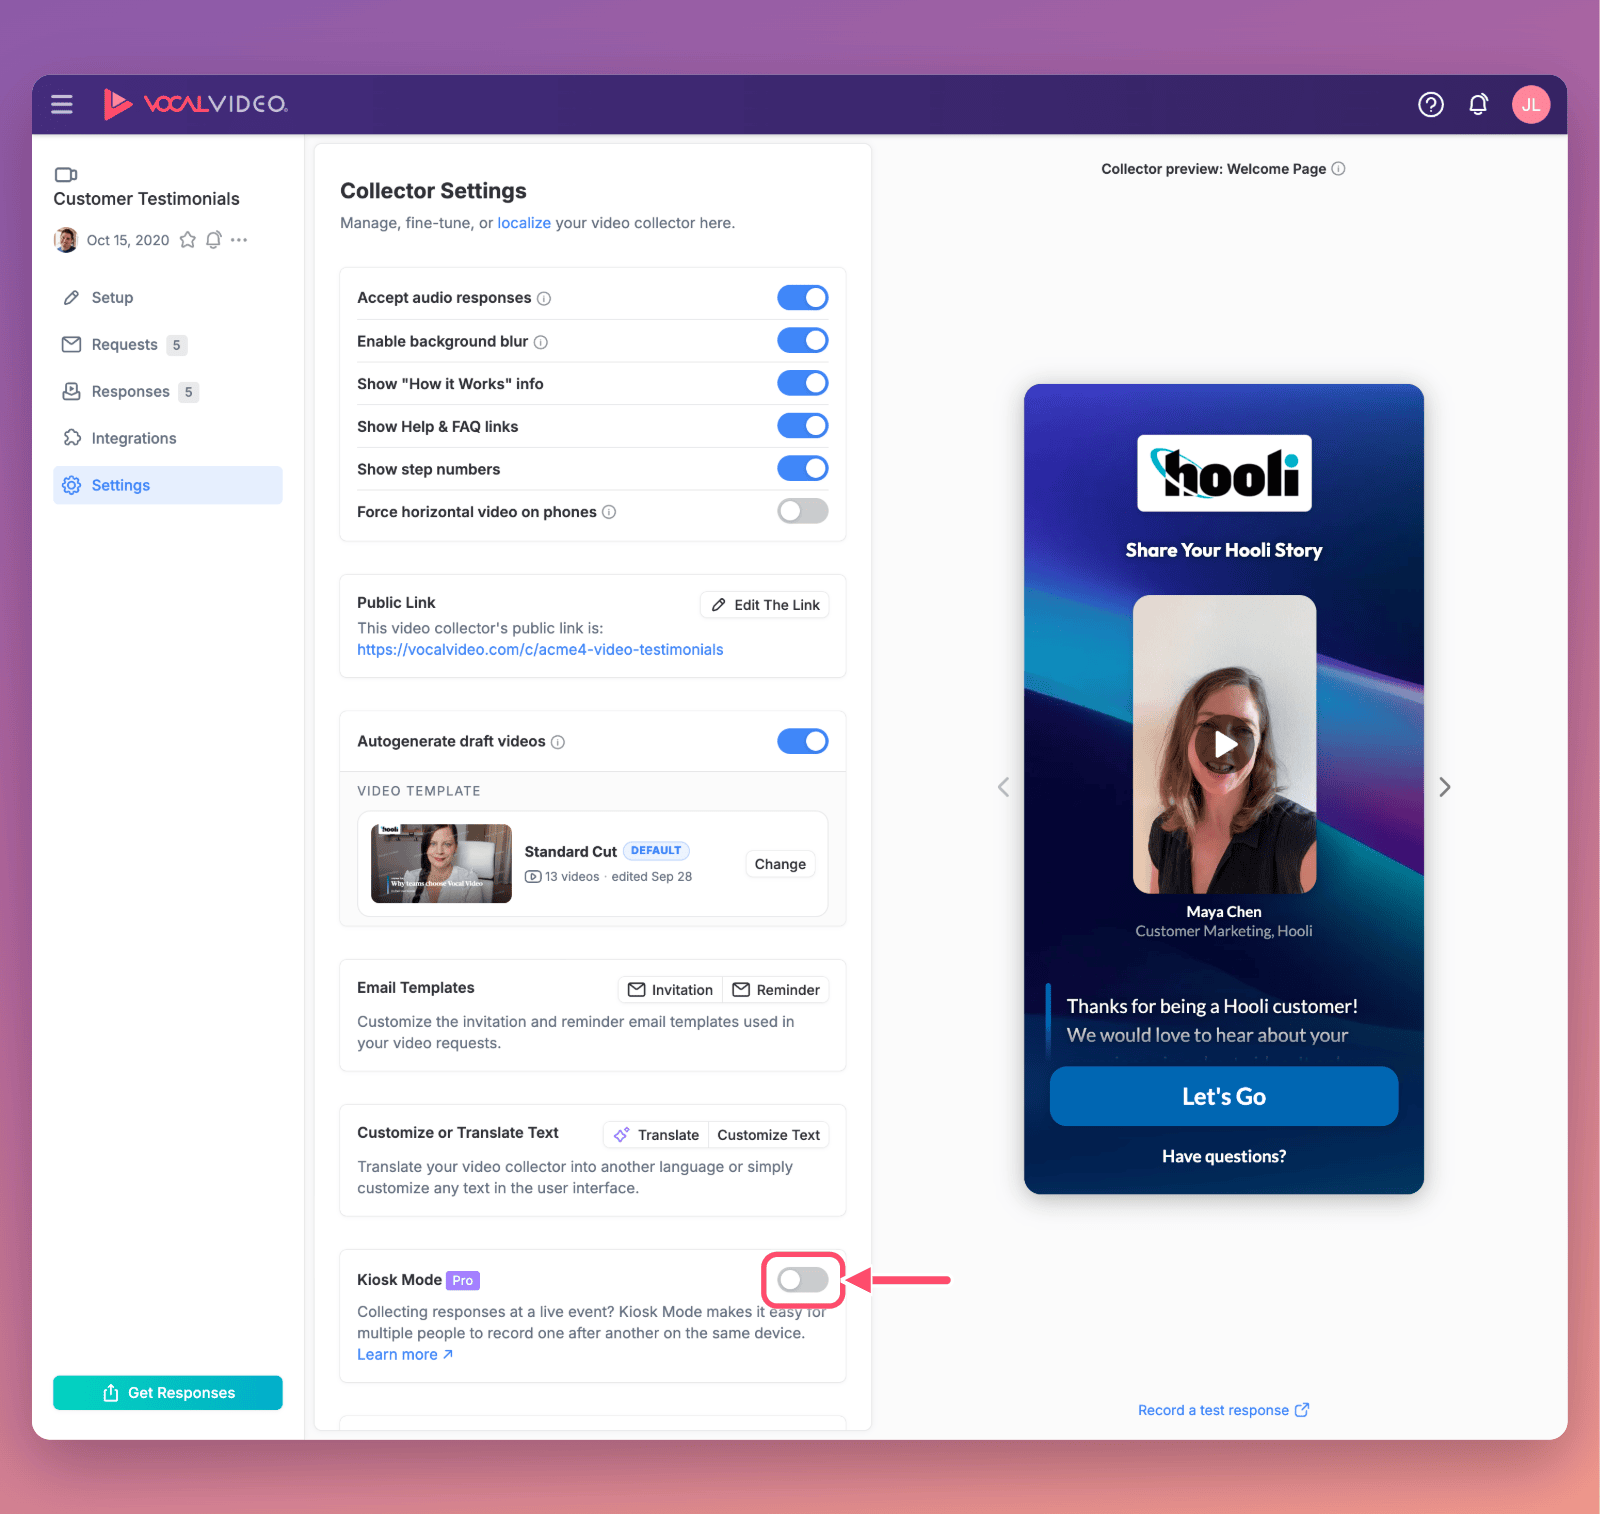
- Open your video collector and click Settings in the collector's menu.
- Scroll down to Kiosk Mode, below Customize or Translate Text, and switch it on.
The collector preview shows the Done button on the Thank-you page, and the Thank-you step of the Collector Editor reminds you that Kiosk Mode overrides any custom call-to-action there.
Using Kiosk Mode on Macs & PCs
1. Enable camera & microphone permissions
Be sure to enable camera & mic permissions and record a test response before your first respondent tries the collector out -- this will give respondents a seamless experience, and will give you a chance to check your lighting and troubleshoot any issues with live-event wifi before someone is trying to record.
2. Use fullscreen mode
When you present a video collector in Kiosk Mode at an event, you'll almost certainly want people to get a fullscreen experience. To do this, look for the small Enter Full Screen link in the bottom-right-hand corner of the screen. (This is only shown when Kiosk Mode is enabled, and only on Macs & PCs.)

3. Use Chrome or Microsoft Edge
In our testing on Macs & PCs, Chrome and MS Edge are better at staying in fullscreen mode than Safari or Firefox, so we recommend them for Kiosk Mode usage on Macs & PCs.
If you need to fully lock-down the machine, you can also install a dedicated kiosk-mode browser that will fully prevent the user from exiting the video-collection experience.
4. Reset the video collector manually
If someone abandons the video collector partway through the process, you can manually reset it for the next respondent with the Restart link in the bottom-right corner.
Using Kiosk Mode on iPads, iPhones & Android devices
1. Install a shortcut on the device's home screen
Fullscreen mode doesn't work the same on tablets & smartphones as on Macs & PCs. For these devices, the best way to run your video collector in Kiosk Mode is to save a link to the video collector's homepage to your phone's home screen. When you open the video collector from the link on the device's home screen, it will automatically open in fullscreen mode and stay that way.
On iPad & iPhone:
- Make sure the video collector's home screen is open in Safari (not inside an app like Gmail or Slack)
- Tap the Share icon
- Select 'Add to Home Screen'
- Edit the title of the home screen link if you wish
- Tap the icon to open the video collector in fullscreen mode
Note: If using an iPad, record horizontally.
On Android:
- Tap the three-dot icon at the top right-hand corner
- Select Add to Home Screen
- Edit the title of the home screen link if you wish
- Tap the icon to open the video collector in fullscreen mode
2. Enable camera & microphone permissions
Just like with desktops, be sure to enable camera & mic permissions and record a test response before your first respondent tries the collector out.
On iPads, each user may be prompted to enable camera & microphone permissions. When you run your kiosk-mode video collector from the shortcut on the device's home screen (as mentioned above), the interface will stay in full-screen mode when this prompt appears.
Still need help? Contact Support at support@vocalvideo.com